The choice, purchase and installation of air conditioners is best done in the off-season. Thus, you can save the family budget for the purchase and self-installation. To ensure smooth operation, the installation of the air conditioner with your own hands should be carried out only according to the instructions, after accurate and mandatory calculations. Otherwise, non-compliance with technical standards, the choice of parts can lead to quick breakdown, an emergency and additional costs.
How to install a split system with your own hands
Currently, due to the variety of variations in the performance of air conditioners, the installation of an air conditioner in an apartment is carried out according to one of the following options:
Standard installation split systems - implies the possibility of unimpeded mounting of brackets, and as a consequence of the external block of the system. In this case, further maintenance of air conditioners is carried out easily, without the use of additional assistance from specialists.
Non-standard installation split systems - implies the possibility of installing an outdoor unit in hard-to-reach places, namely:
- Away from the window.
- Above 3 floors.
- In a hard-to-reach place.
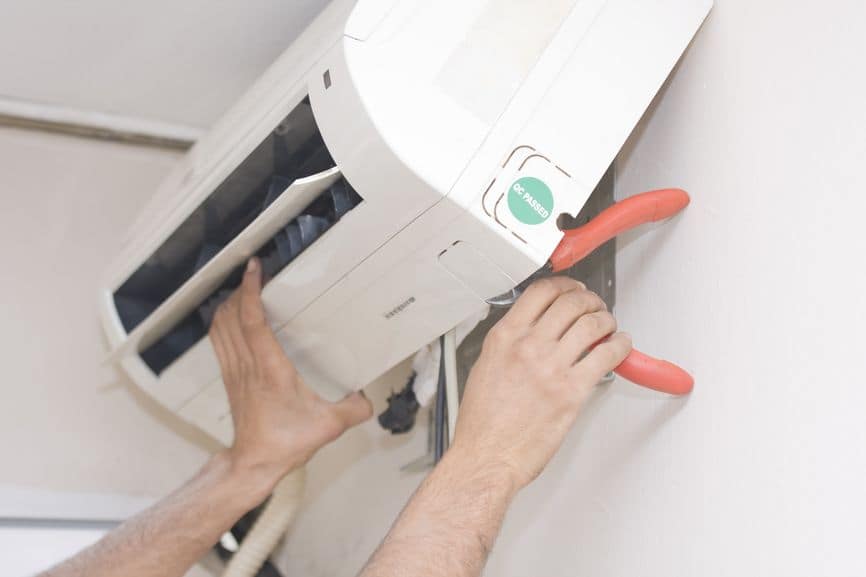
Often, to install an outdoor unit of an air conditioner in a non-standard installation, it is necessary to use the services of climbers who have a special permit and access to work.
This state of affairs implies the need for further contact with specialists to carry out preventive and repair work on the outdoor unit of the air conditioner.
Therefore, to save the family budget, if possible, we give preference to self-installation. Moreover, resorting to the services of experienced engineers, the process of installing the air conditioner will be the same.
See also:
- 5 best Toshiba air conditioners 2026 of the year
- 5 best Panasonic air conditioners 2026 of the year
- 5 best LG air conditioners 2026 of the year
- 5 best Daikin air conditioners 2026 of the year
- 6 best Mitsubishi Electric air conditioners 2026 of the year
Preparatory work
Very often, the installation of split systems in the house begins after the repair of the premises or unscheduled. For the most clean installation, when there is no desire to disturb the idyll of the created interior, it is recommended to perform all manipulations with extreme caution.
After the air conditioner has been delivered to the premises, it is necessary to decide on the next steps. To do this, we open the packaging, check the presence of all elements, integrity, technical documentation, the presence of completed warranty obligations from the manufacturer with wet seals.
![]() See also - Air conditioner operating modes: an overview of popular functions
See also - Air conditioner operating modes: an overview of popular functions
The principle of operation of air conditioners
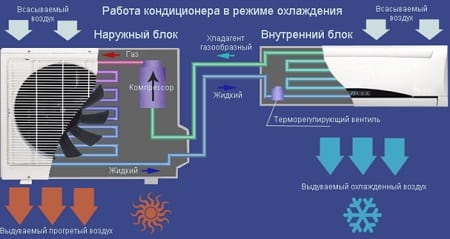
The air conditioner operation scheme is based on the implementation of a clear sequence, namely:
- The refrigerant is supplied through a nozzle to the evaporating unit.
- Once in the chamber of the evaporator, the substance actively changes shape, temperature (boils), begins to absorb heat.
- At this time, water condensate is released inside the system and deposited on the radiator.
- From a radiator through a special tube, liquid is transported to the tank, and is discharged outside the working area.
It should be noted that the efficiency of the system and the consumption of electrical energy installed by yourself directly depends on the operating conditions and correct installation.
In order to extend the life of the equipment, the installation of such equipment should be carried out only in accordance with the provided calculations and the block layout diagram, which will indicate the exact location and installation of the system.
![]() See also - How to choose the perfect air conditioning for home and apartment
See also - How to choose the perfect air conditioning for home and apartment
Required Tools for Air Conditioner Installation
Correct installation of split systems is simply impossible without the use of specialized equipment, which facilitates not only the process itself, but also contributes to the decoration of the aesthetics of the room.
So, we need a kit for installing an air conditioner:
- Pump.
- Tester for electrical networks.
- Indicator.
- Pipe cutter.
- Perforator.
- Reamer.
In addition, it is necessary to have a coil of copper tube with seamed edges. Important! It is unacceptable to use material with obvious physical damage.
![]() See also - How to repair an air conditioner yourself
See also - How to repair an air conditioner yourself
Air conditioner installation steps
In order to figure out how to install the air conditioner with your own hands, you must perform the following steps in the exact sequence:
Development of a working scheme for all blocks of the climate system
Do-it-yourself air conditioner installation begins with the development and calculation of a security drawing. In accordance with it, the most safe operating conditions for the equipment are provided. The diagram contains information in accordance with which the location of all parts of the air conditioner, the installation of the connecting strip, taking into account the dimensions of the equipment, are approved. When choosing a place to install split systems, you must consider some issues:
- The distance between the ceiling and the air conditioner is at least 10 cm, from the corner to the unit more than 5 cm.
- The air conditioner must not be obstructed by foreign objects (tulle, curtain, blinds, doors, etc.).
- The distance from the floor to the air conditioner is above 2 meters.
- The presence of an outlet for the air conditioner.
Purchase of additional materials
Screws, bolts, nails, tubes and other elements can act as additional materials, the purchase of which is recommended to be carried out in specialized retail outlets.
Outdoor unit layout, installation
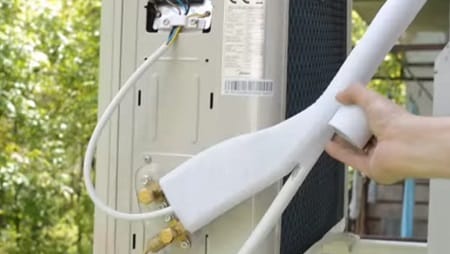
In the process of marking the location of the outdoor unit, do not forget about safety precautions, use special equipment at the level of the 2nd floor and above. When installing an outdoor unit in a multi-storey building, you need to pay attention to some aspects:
- The case should not be a hindrance to neighbors.
- The installation of the unit must be carried out within reach of an outstretched hand. Due to the fact that the climatic equipment needs servicing, it can only be provided with a normal location.
- Further, as the diagram shows, the marking and fastening of the brackets to the anchor bolts is performed. In the event that the installation of the brackets is carried out in a brick house, then it is best to drill holes between the bricks.
- The outdoor unit is mounted at a distance of at least 10 cm from the wall surface.
Internal system installation
In accordance with safety precautions, it is prohibited to install the indoor unit behind curtains, over electrical appliances, not far from water or heating pipes. Installation of the mounting plate is carried out at the level of 10 cm from the ceiling and 5 cm from the edge of the wall.
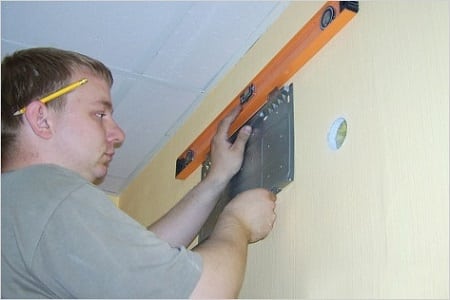
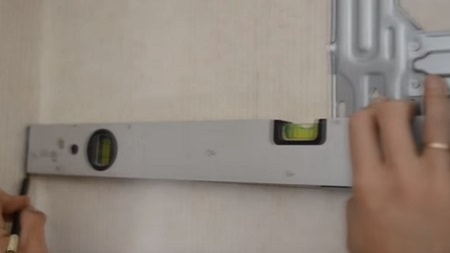
The location and exact fastening of the plate contains the engineering diagram, in accordance with which we position and fix the mounting plate on the wall. In order to accurately mount the platinum and the further location of the route, experts recommend that you pre-make marks on the wall with a pencil.
When marking the route, do not forget about the slope, which is necessary for the equipment to correctly drain the condensate, to exclude the overflow of the tank and damage to the just made repairs.
Further, when the plate is fixed, an indoor unit is mounted on top of it.
Marking and installation of connecting elements
Preliminary marking and calculation of the location of the communication connection are also carried out with a pencil on the wall. Then, with the help of special tools, containers are drilled for laying cables, an external hole for equipping the connection between the two blocks.
It should be noted that the minimum wiring space should be 1.5 sq. Mm, and the diameter of the through hole should be 40-45 mm.
Assembling the interblock route
For the equipment of the interblock route you will need:
- A copper pipe that provides transportation of freon in various conditions between the blocks. To ensure the correct transportation of freon, pipes of 2 sizes are used.
- Corrugated drainage with a diameter of 16 mm, designed to drain condensate.
- Heat insulator. It is used for the equipment of the route in order to exclude the release of condensate formed due to temperature differences.
- PVA wire (section 3.5 mm). It is used for power supply equipment, connection of both units, organization of the system operation from the remote control.
- Plastic box. Used for accurate equipment of the track on both sides. The fastening of the box begins along the inner wall, right up to the hole. Further from the hole itself on the outside, a route is laid to the external block of the system.
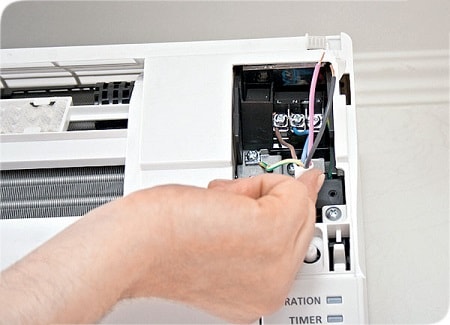
Only after the wiring is completed, proceed with the installation of the circuit breaker. As the wiring diagram with the shield shows, it is necessary to connect the neutral with the yellow (marked with a green stripe) wire.
Important:
To correctly determine the zero and phase, it is recommended to use a special indicator.
After that, using insulated stranded wires, the connection of the terminals of both blocks is realized through a through hole in the wall. It should be noted that the entire connection diagram and the names of the terminals are clearly described in the attached equipment manual.
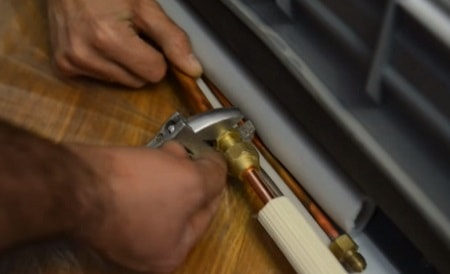
Laying pipes with subsequent processing is carried out carefully and only with the help of a specialized tool. The use of improvised materials for flaring, cutting and joining pipes can lead to cracking, wrinkling, and the formation of dents. Also, to ensure the efficient operation of the system, working pipes need special thermal insulation, polyurethane hoses.
Connection and check for equipment performance
Evacuation equipment is the removal of all kinds of dust particles and other objects that fell during installation inside the system. The beginning of the process can be started only after the connection diagram is implemented, the connections are sealed. Then, with the help of a vacuum pump, air is pumped out from all the equipment, and refrigerant is injected.
Studying the stages of work and adhering to simple rules, you can install an air conditioner in an apartment with your own hands at no extra cost.
See also:

